


A short top lip can obstruct filling, sealing, or opening. An oversized lip wastes space. I define each function first, then size the lip around it.
I set the lip above a PE ziplock bag zipper from the filling method, finger access, final heat seal, tear notch, hang hole, and artwork. Buyers should not copy one universal dimension. They should approve the open, filled, sealed, and reopened bag on the intended packing line.
The right specification starts with a simple map of the bag's top zone. This guide shows what to define, measure, and test before a bulk order.
What Does the Lip Above a Zipper Need to Accommodate?
The word “lip” sounds like one small dimension, but several operations may compete for that space. Missing one operation can make an otherwise correct bag awkward.
The top lip may need room for gripping, opening, product loading, a permanent heat seal, a tear notch, a hang hole, printed information, and manufacturing tolerances. I size it only after the buyer identifies which of these functions the bag actually needs.
I separate usable space from total bag length
I first ask the buyer to mark four horizontal references on a drawing: the cut top edge, the zipper profile, the intended final seal, and the product fill limit. These references prevent a common misunderstanding. A quoted overall length may include material above the zipper, while the usable product length begins below it. Buyers who compare only overall dimensions can therefore compare two bags with different internal capacities.
The lip also has two sides. The front and back film can end at the same height, or one side can extend farther to improve separation during hand filling. I ask buyers to state that choice instead of relying on a sample that may be interpreted differently.
| Top-zone function | Question I ask before sizing | Risk if omitted |
|---|---|---|
| Finger opening | Will operators separate the lips by hand? | Slow or frustrating opening |
| Product loading | What tool, chute, or hand enters the mouth? | Spillage or contact with the zipper |
| Final heat seal | Will the pack be sealed above the zipper after filling? | No clear sealing area |
| Tear notch | Must the consumer remove a sealed header? | Poor opening sequence |
| Hang hole | Will the bag hang before or after filling? | Hole conflicts with seal or print |
| Artwork | What must remain readable after sealing or tearing? | Hidden or discarded information |
When buyers source custom ziplock bags, I recommend that the drawing label every one of these functional zones. A single “lip length” note is useful, but a dimensioned top-zone drawing is safer.
How Do Filling and Final Sealing Change the Required Lip Length?
A lip that feels adequate on an empty hand sample can fail on the packing line. Product flow, gloves, fixtures, and sealing jaws change the real requirement.
Hand filling usually needs a lip that operators can separate and hold. Chute filling needs clearance around the filling head. A final heat seal needs its own clean, flat band above the zipper, plus separation from other features according to the approved drawing and equipment trial.
I work backward from the packing process
I ask buyers to describe the sequence, not just the finished appearance. An operator may open the zipper, place the product, press the zipper closed, and then apply a permanent top seal. Another operation may receive the bag already open and use guides to present it to a filling station. Those workflows place different demands on the same strip of film.
The product matters too. A bulky item may need a wide mouth and firm hand access. Small loose pieces can enter the zipper track if the loading path is cramped. Powders or oily products can also contaminate the closing or sealing area, so the process must keep those areas clear. I do not promise a suitable lip from the product name alone; I ask for the filled shape and the actual loading method.
I request machine information before freezing the drawing
For heat sealing, the buyer should provide the sealer type, jaw or band contact area, the way the bag is positioned, and any required registration point. The equipment owner should set and validate operating conditions for the chosen bag and contents. I avoid prescribing a universal sealing temperature, time, or lip dimension because film structures and machines differ.
A useful approval test follows the real order of work: open the bag, load a representative product, clear the top, close the zipper, make the final seal, inspect the top area, and reopen the package as a user would. This trial often exposes access and alignment problems that a flat drawing cannot show.
Top features can look correct separately yet collide in production or use. A coordinated feature map keeps the seal, opening path, display hole, and artwork from competing.
I place the permanent seal, tear notch, zipper, hang hole, and critical print in a defined vertical order. The tear path must release the header without damaging the zipper, while the hole and artwork must stay outside seal and cut zones shown on the approved artwork.
I design the opening sequence before the graphics
If a buyer wants a tamper-evident top seal, I ask what the customer should do first. The typical concept is simple: the customer tears away or opens the sealed header and then uses the zipper for repeated access. However, the actual positions must be approved for the chosen construction. The tear notch cannot be treated as decoration. Its height and side position determine where the tear begins, while the zipper determines what must remain intact.
A hang hole adds another constraint. I ask whether the filled package will hang in retail, what orientation the display requires, and whether the hole sits in material that remains attached. The buyer should also confirm the packed weight and retail fixture with the responsible packaging team. I do not assume that adding a hole alone makes a package suitable for hanging.
I keep critical copy out of changing zones
Artwork needs a top-zone overlay that shows the cut edge, seal band, tear path, zipper, hole, and safe print area. A logo can sometimes cross a noncritical visual boundary, but instructions, lot-code areas, barcodes, and required statements should remain readable in the intended finished state. Market-specific labeling decisions remain the buyer's responsibility.
XINYUAN provides free artwork and typesetting service, so I can help translate the agreed structure into a workable layout. If a printed pattern requires a plate, a plate fee may apply. The fee goes to the plate-making factory, and the same unchanged pattern normally does not need a new plate on a later order. I confirm the commercial details in the quotation.
What Should Buyers Put on the Drawing and Test Before Bulk Approval?
Verbal requests such as “leave enough lip” invite different interpretations. A controlled drawing and realistic sample test turn that preference into a repeatable purchasing specification.
The approval drawing should show overall and usable length, each lip edge, zipper location, seal band, tear notch, hole, artwork limits, and measurement reference points. Buyers should test filling, closing, sealing, hanging if relevant, shipping preparation, and consumer reopening with representative contents.
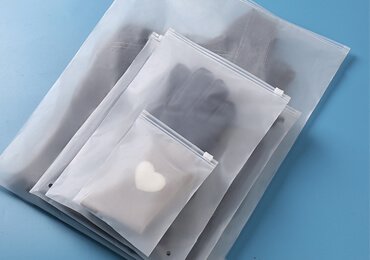
I use a top-zone specification checklist
I ask the buyer to approve dimensions with clear reference points rather than measuring from an uncertain fold or visual line. The drawing should identify whether overall length includes the top lip and whether usable length is measured to the zipper, below the zipper, or to another agreed reference. It should also show whether both film panels have equal lips.
The purchase specification should connect the drawing to the packing process. I recommend recording the product or representative test load, fill quantity by the buyer's own control method, filling tool, closing step, final sealing equipment, required hole use, and the version of approved artwork. Buyers should also define how they will inspect incoming bags. These details make discussions more objective if a later sample differs from expectations.
| Approval item | What the buyer should record |
|---|---|
| Dimensional references | Exact start and end points for every top-zone measurement |
| Filling trial | Product, load, operator or machine, and observed access |
| Closure trial | Zipper alignment and reopening after representative use |
| Final-seal trial | Equipment, positioning method, and accepted seal appearance |
| Feature trial | Tear sequence and hanging check when those features apply |
| Artwork approval | File version and protected print areas |
I recommend samples before volume production
I can provide free in-stock samples so buyers can compare basic feel and operation. A separately produced custom sample may require a sample fee. For a later bulk order, I can return that fee or deduct it from the bulk-order price, subject to the confirmed quotation. A stock sample cannot prove that a new custom top zone fits the buyer's process, so the final approval should match the ordered dimensions and features as closely as the project risk requires.
At XINYUAN, I use our integrated production organization and experienced team to support repeatable large orders and long-term supply. My operating focus is dependable execution, but the buyer's clearest protection is still an approved drawing, a controlled artwork file, and a packing-line trial that reflects actual use.
Conclusion
I size a PE ziplock bag lip around access, filling, sealing, opening, display, and artwork, then confirm the complete top zone with a drawing and realistic test.